I developed this bread recipe several years ago for my son, Galen, who is gluten-sensitive. He was preparing to take the MCATS (the entrance exams for medical school) and really needed his brain to be in optimal working order. He did so well on the MCAT that he received a 100% merit scholarship to Washington University, St. Louis, where he is now in his 3rd year. I like to think this Millet Sesame Bread helped.
It’s since become my family’s favorite bread, and the more I have learned about gluten’s adverse effects on our bones, the happier I am to have such a delicious, good-for-my-bones millet sesame seed bread to enjoy. I hope you will enjoy it as much as we do!
This recipe produces a beautiful, high-rising loaf of light, white bread with a golden crust. But this “white” bread is not light on the healthy nutrients your bones need. Arrowroot and sesame seeds are loaded with calcium. Millet and sorghum deliver protein, fiber, and a variety of trace minerals. Flaxseed meal provides more fiber along with the anti-inflammatory omega-3 fatty acid, alpha-linolenic acid, and chia seeds are packed with antioxidants and gut-healing soluble fiber.


Gluten-Free Millet Sesame Seed Bread
Ingredients
- 2 tbsp chia seeds
- 1/2 cup water
Dry ingredients
- 1/2 cup potato starch
- 1 cup arrowroot
- 1 & 1/2 cup millet flour
- 1/2 cup sorghum flour
- 1/3 cup flaxseed meal
- 1 tsp salt
- 1 tsp xanthan gum
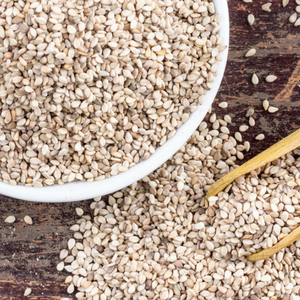
- 2 tbsp sesame seeds
- 1 tbsp coconut oil (to grease loaf pan)
For the yeast mixture
- 1 & 1/2 cup water lukewarm
- 1 tbsp active dry yeast (1 package)
- 3 tbsp olive oil extra virgin
- 2 tbsp maple syrup
Instructions
- Put 2 tablespoons of chia seeds in a ½ cup of water and let soak for 15 minutes.
- While the chia seeds soak, lightly grease an 8-inch by 4-inch by 4-inch Pyrex glassware loaf pan with coconut oil. You can also dust the inside of the baking pan with millet flour, although just rubbing the inside of the loaf pan with coconut oil is likely all you’ll need to do to prevent your bread from sticking.
- Next, prepare your yeast mixture and combine your dry ingredients.
- In a large mixing bowl (I just have a handheld mixer, so no bowl comes with it; if you have a stand-up mixer, just use the bowl that attaches to it), add all the ingredients for the yeast mixture.
- In 3-5 minutes, the yeast will begin to feed on the maple syrup and foam will appear. While you’re waiting for this magic to happen, combine your dry ingredients.
- In a medium-sized mixing bowl, add the dry ingredients and gently whisk together to combine evenly.
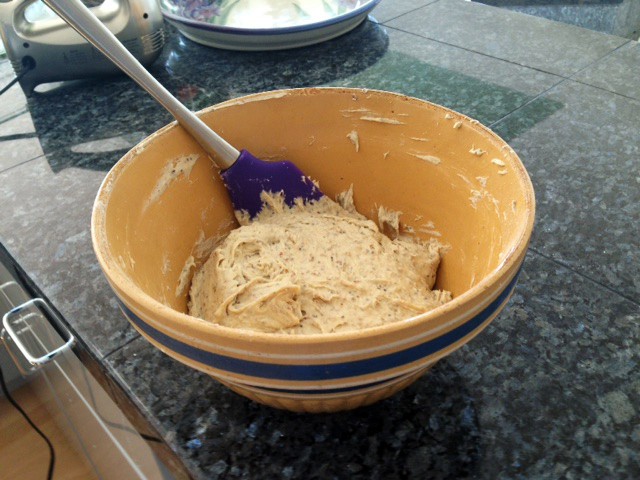
- Now add the chia seeds with their soaking liquid to the yeast mixture. Then add your combined dry ingredients, a cup at a time, to the yeast mixture, mixing after each addition. Mix all ingredients together until you have a soft dough; this will happen within just a couple of minutes.
- Once your soft dough has formed, use a spatula to guide and pour the batter-like bread dough into your prepared loaf pan. Smooth the surface, so the dough is evenly spread, and no open air pockets remain along the bottom sides of the loaf pan.
- Sprinkle the top of the loaf with 2 tablespoons of sesame (or sunflower) seeds (or a mix of both), then use your spatula or a spoon to lightly press the seeds into the dough, so they will adhere once the bread has baked.
- Cover the loaf pan with a damp dishtowel and place it somewhere warm until the dough rises to the top of the pan—this takes about 1 hour. I use my toaster oven to let the dough rise, and set it on Warm, which is 120 degrees.
- Once the dough has risen, use a knife to lightly slash the loaf along the side. Scoring the loaf along the length of the pan will allow air to escape as the bread is baking. I often forget to do this and have had no problems, but it’s a good idea to err on the side of safety here.
- Put the loaf back into your toaster oven and set it to BAKE at 350 degrees for approximately 1 hour and 15 minutes. Or place the loaf in your oven and bake at 350 degrees for approximately 1 hour and 30 minutes. My toaster oven runs hotter than my large oven, and typically takes 1 hour,15 minutes to completely bake the loaf, while my oven takes 10-15 minutes longer. Every oven is slightly different, so yours may bake more slowly or more quickly at this temperature. (You can check your oven’s actual temperature by using an inexpensive oven thermometer.)
- The first time you bake this bread, check the loaf after 1 hour. If the top looks browned, cover with oiled parchment paper for the remaining 15 minutes of baking time if using a toaster oven or 30 minutes of baking time if using a full-size oven. If the bread smells done sooner, insert a knife or wooden skewer into the loaf to check. When the knife or skewer comes away clean, the loaf is done. Once you know how quickly your oven is baking, you can make a note and bake all future Millet Sesame Bread loaves for this amount of time.
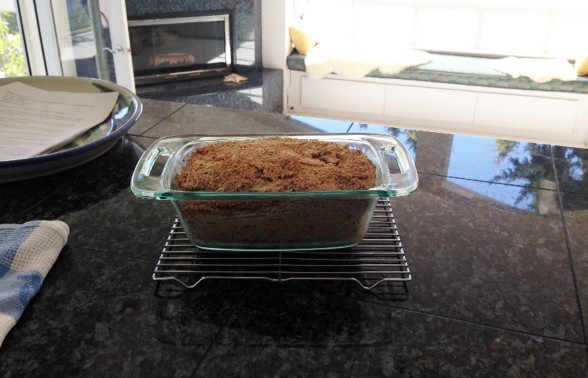
- Remove your bread from the oven and place the loaf, still in the pan, on a rack to cool. Once the loaf has cooled, about 45 minutes to 1 hour, take a knife and go around the edges of the pan to ensure the loaf is free, turn the pan over, and your bread should easily drop out. Place the loaf back on the rack and let it finish cooling completely (about another 15 minutes). Slice (16 – 18 slices) and ENJOY!
Notes
Nutrition

Sorghum, a grain with unique bone-protective benefits
Sorghum has special health-protective properties superior to those of other staple grains – insights just confirmed in a meta-analysis of 19 studies published in the September 2016 issue of Nutrition Reviews.
The results of current studies indicate that sorghum helps maintain healthy blood sugar and insulin levels and decreases oxidative stress. When sorghum is consumed, the increase in blood sugar that typically occurs after a meal is up to 26% less compared to the increases in blood sugar seen after consuming wheat, corn or rice.
Not surprisingly, since blood sugar rises so much less, the amount of insulin produced to usher that sugar inside our cells is also significantly lower – a full 55% lower when sorghum is consumed compared to wheat, maize or rice!
In addition, after sorghum is eaten, levels of beneficial polyphenols are higher, while those of markers of oxidative stress (free radical damage) are much lower:
- Two hours after eating pasta containing 30% red sorghum, a 24% increase in blood levels of protective polyphenols was seen. In contrast, the consumption of wheat pasta caused a 1% decrease in polyphenols over the same 2-hour time period.
- In addition, a 34% increase in the activity of a powerful antioxidant our bodies produce called superoxide dismutase (SOD) was recorded after consumption of red sorghum pasta, while consumption of wheat pasta produced a puny increase in SOD of just 0.7%.
- Lastly, protein carbonyl, a marker of oxidative stress/free radical damage to proteins in the body, decreased by 26% after red sorghum consumption, but increased by 8% after wheat pasta consumption.

Why is this important for the health of your bones?
High blood sugar and high insulin levels promote oxidative stress, and all three (high blood sugar, high insulin levels, oxidative stress) promote inflammation. When the foods we consume at every meal trigger large increases in blood sugar and insulin, and cause oxidative stress, we are constantly in a state of low grade inflammation. And when chronic, inflammation, even low grade inflammation, activates osteoclasts, causing bone loss. ¹⁻²
Want more recipes like this Millet Sesame Seed Bread? Download your FREE Recipes for Stronger Bones below and get instant access now!
Sources:
- Simnadis TG, Tapsell LC, Beck EJ. Effect of sorghum consumption on health outcomes: a systematic review. Nutr Rev. 2016 Sep 30. pii: nuw036. [Epub ahead of print] PMID: 27694643
- Poquette NM, Gu X, Lee SO. Grain sorghum muffin reduces glucose and insulin responses in men. Food Funct. 2014 May;5(5):894-9. doi: 10.1039/c3fo60432b. PMID: 24608948
[recipe_widget]


Susan
September 7, 2016 , 9:04 amCan this recipe be done in a bread machine? Also, can Bob’s Red Mill gluten free flour be used?