Hope you try the cornbread – at least the quick one – it’s really delicious. And the pumpkin seeds – roasting them yourself is easy, and the cost is WAY less than if you buy them roasted and spiced, and you know how they were roasted (i.e., low temperature with organic olive oil and organic spices).
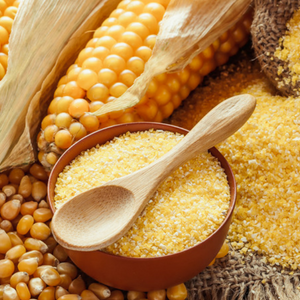
Lara's Quick Gluten-Free Corn Bread
Ingredients
Dry Ingredients
- 1 cup sorghum flour or quinoa organic
- 1 cup cornmeal organic
- 2 tsp baking powder
- 1/2 tsp sea salt
Wet Ingredients
- 3 tbsp chia seeds (soak in 1/2 cup water)
- 1/2 cup olive oil extra virgin, organic
- 1/2 cup milk (organic cow’s milk or soy milk or almond milk)
- 2 eggs free-range pastured
- 1 tbsp maple syrup (or 2 tablespoons if you prefer a slightly sweeter corn bread)
Instructions
- Preheat the oven to 350 degrees F and lightly grease an 8-inch by 4-inch by 4-inch Pyrex glassware loaf pan. If not allergic to dairy, use organic butter from pastured cows. If you prefer to avoid dairy, use coconut oil.
Roast pumpkin seeds for Topping
- Toss ½ cup of organic pumpkin seeds with 1 tablespoon organic extra virgin olive oil and ½ teaspoon of each of the following spices: cumin, coriander, turmeric, cayenne pepper plus ¼ teaspoon sea salt.
- Spread evenly over a cookie sheet and roast at 225 degrees F for 5-10 minutes, until toasted. Keep an eye on them while roasting as seeds can quickly burn.
While your pumpkin seeds are roasting
- Add the 3 tablespoons of chia seeds to ½ cup of water, so they will be soaking while you get the rest of your ingredients ready.
- In a medium bowl, combine the dry ingredients and stir to mix well.
- In a large bowl, combine the wet ingredients. Add the chia seeds last, so they have around 10 minutes soaking to become fully glutinous. Stir to mix well. Then one cup at a time, mix in the dry ingredients.
- Pour the batter into your greased bread pan, top with a handful of roasted pumpkin seeds, lightly pressing them into the dough with a spoon. Bake for 40 minutes or until golden and firm to the touch.
Nutrition

Lara’s Gluten-free Yeasted Corn Bread
Ingredients
Dry Ingredients
- 1/2 cup cornmeal
- 1/2 cup potato starch
- 1/2 cup arrowroot
- 1/2 cup tapioca
- 1 cup millet flour
- 1 tsp salt
- 1 tsp xanthan gum
Wet Ingredients
- 1 1/2 cups lukewarm water
- 1 tbsp dry yeast active
- 3 tbsp olive oil extra virgin
- 2 tbsp maple syrup
Instructions
- Preheat the oven to 350 degrees F and lightly grease an 8-inch by 4-inch by 4-inch Pyrex glassware loaf pan.
Roast pumpkin seeds for Topping
- Toss ½ cup of organic pumpkin seeds with 1 tablespoon organic extra virgin olive oil and ½ teaspoon of each of the following spices: cumin, coriander, turmeric, cayenne pepper plus ¼ teaspoon sea salt.
- Spread evenly over a cookie sheet and roast at 225 degrees F for 5-10 minutes, until toasted. Keep an eye on them while roasting as seeds can quickly burn.
While your pumpkin seeds are roasting
- Soak 3 tablespoons of chia seeds in ½ cup of water for 10 minutes.
- While the chia seeds soak, lightly grease an 8-inch by 4-inch by 4-inch Pyrex glassware loaf pan. If not allergic to dairy, use organic butter from pastured cows. If you prefer to avoid dairy, use coconut oil.
- Next, in a large bowl, combine your yeast mixture (the wet ingredients).
- In 3-5 minutes, the yeast will begin to feed on the maple syrup and foam will appear.
- While you’re waiting for this magic to happen, combine your dry ingredients.
- In a medium-sized mixing bowl, add the following dry ingredients and gently whisk together to combine evenly.
- Now add the chia seeds with their soaking liquid to the yeast mixture. Then mix in your combined dry ingredients, a cup at a time, into the yeast mixture, mixing after each addition. Mix all ingredients together until you have a soft dough; this will happen within just a couple of minutes.
- Once your soft dough has formed, use a spatula to guide and pour the batter-like bread dough into your prepared loaf pan. Smooth the surface, so the dough is evenly spread, and no open air pockets remain along the bottom sides of the loaf pan. Top the dough with a handful of roasted pumpkin seeds, lightly pressing them in with a spoon.
- Cover the loaf pan with a damp dishtowel and place it somewhere warm until the dough rises to the top of the pan—this takes 45 minutes to 1 hour. I use my toaster oven to let the dough rise, and set it on Warm, which is 120 degrees.
- Once the dough has risen, use a knife to lightly slash the loaf along the side. Scoring the loaf along the length of the pan will allow air to escape as the bread is baking. I often forget to do this, and have had no problems, but it’s a good idea to err on the side of safety here.
- Put the loaf back into your toaster oven and set it to BAKE at 350 degrees for 1 hour. The first time you bake this bread, check the loaf after 45-50 minutes. Check for doneness by inserting a knife or long wooden skewer into your bread. If it comes out clean, it’s done. If not, you need to bake for an additional 10 – 15 minutes.
- Or place the loaf in your oven and bake at 350 degrees, testing after 1 hour. My toaster oven runs hotter than my large oven, and typically takes 1 hour to completely bake this cornbread, while my oven takes 10-15 minutes longer. Every oven is slightly different, so yours may bake more slowly or more quickly at this temperature. (You can check your oven’s actual temperature by using an inexpensive oven thermometer.)
- If the top looks browned, cover with oiled parchment paper for the remaining baking time. Once you know how quickly your oven is baking, you can make a note and bake all future Corn Bread loaves for this amount of time.
- Remove your bread from the oven and place the loaf, still in the pan, on a rack to cool. Once your cornbread has cooled, about 45 minutes to 1 hour, take a knife and go around the edges of the pan to ensure the loaf is free, turn the pan over, and your bread should easily drop out. Place the loaf back on the rack and let it finish cooling completely (about another 15 minutes). Slice and ENJOY!
Nutrition


Sorghum, a grain with unique bone-protective benefits
Sorghum has special health-protective properties superior to those of other staple grains – insights just confirmed in a meta-analysis of 19 studies published in the September 2016 issue of Nutrition Reviews.
The results of current studies indicate that sorghum helps maintain healthy blood sugar and insulin levels and decreases oxidative stress. When sorghum is consumed, the increase in blood sugar that typically occurs after a meal is up to 26% less compared to the increases in blood sugar seen after consuming wheat, corn or rice.
Not surprisingly, since blood sugar rises so much less, the amount of insulin produced to usher that sugar inside our cells is also significantly lower – a full 55% lower when sorghum is consumed compared to wheat, maize or rice!
In addition, after sorghum is eaten, levels of beneficial polyphenols are higher, while those of markers of oxidative stress (free radical damage) are much lower:
-
- Two hours after eating pasta containing 30% red sorghum, a 24% increase in blood levels of protective polyphenols was seen. In contrast, the consumption of wheat pasta caused a 1% decrease in polyphenols over the same 2-hour time period.
-
- In addition, a 34% increase in the activity of a powerful antioxidant our bodies produce called superoxide dismutase (SOD) was recorded after consumption of red sorghum pasta, while consumption of wheat pasta produced a puny increase in SOD of just 0.7%.
- Lastly, protein carbonyl, a marker of oxidative stress/free radical damage to proteins in the body, decreased by 26% after red sorghum consumption but increased by 8% after wheat pasta consumption.
Why is this important for the health of your bones?
High blood sugar and high insulin levels promote oxidative stress, and all three (high blood sugar, high insulin levels, oxidative stress) promote inflammation. When the foods we consume at every meal trigger large increases in blood sugar and insulin and cause oxidative stress, we are constantly in a state of low-grade inflammation. And when chronic, inflammation, even low-grade inflammation, activates osteoclasts, causing bone loss. ¹⁻²
Sources:
-
- Simnadis TG, Tapsell LC, Beck EJ. Effect of sorghum consumption on health outcomes: a systematic review. Nutr Rev. 2016 Sep 30. pii: nuw036. [Epub ahead of print] PMID: 27694643
- Poquette NM, Gu X, Lee SO. Grain sorghum muffin reduces glucose and insulin responses in men. Food Funct. 2014 May;5(5):894-9. doi: 10.1039/c3fo60432b. PMID: 24608948

Article Comments